How To Integrate SonarQube With Jenkins For Code Analysis
How To Integrate SonarQube With Jenkins For Code Analysis
I want to ensure the quality of the code, identify bugs, code vulnerabilities, code smells, and align with code standards after committing codes into repositories such as Github and Gitlab. And the same way build my code automatically, using Jenkins. I want to perform this task whenever I commit code and see the static code analysis report at SonarQube.
In this case, GitLab-Jenkins-SonarQube integration comes to play. In this tutorial, I’m going to demonstrate how to integrate SonarQube with the Jenkins server.
Work Flow - How It Goes?
Developer commit code changes to the GitLab/GitHub. Then, the Jenkins server will fetch/pull code changes from Git repository and do a static code analysis using Sonar-Scanner and send analysis reports to SonarQube server. Finally, Jenkins build the project code.
Before You Begin !!!
I Assume…
You have a Pre-Configured Jenkins server If not? Refer to my other article to complete Jenkins Installation
You have a Pre-Configured SonarQube server If not? Refer to this article to complete SonarQube Installation
You have a GitLab/GitHub account with a developer role. If not? Refer to this article to complete GitLab-Jenkins integration
You have integrated GitLab/GitHub with Jenkins server
STEP 01: Generate User Token
Log in to SonarQube Server and go-to the “My Account” section on your profile. And move to the “Security” tab. Then, Generate a “User Access Token.”
Login > Profile > My Account > Security > Generate Token
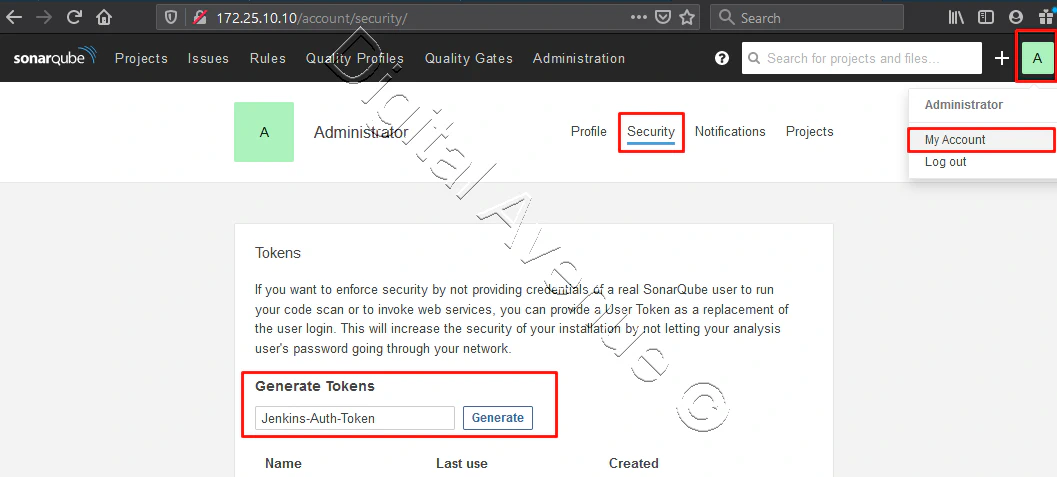
You need to copy & save this code immediately. This code won’t be able to see again. It shows only once.

Jenkins-Auth-Token : 7a09705df7d034b99459b5127303a8315f5bdf6d
STEP 02: Install Sonar-Scanner on Jenkins
Let’s move on to your Jenkins server and install the following plugins.
SonarQube Scanner for Jenkins
Plain Credentials Plugin
Credentials Plugin
Manage Jenkins > Manage Plugins > Available [TAB] > Search For SonarQube > Install Plugins


Restart once plugins installed on the Jenkins server.
STEP 03: Add SonarQube Authentication Token Into Jenkins
Head-over to Jenkins server and go-to Jenkins > Credentials > System > Global Credentials > Add Credentials
Kind: Secret test
Secret: SonarQube Authentication Token
Description: Provide a descriptive name
Click OK to add new credentials.
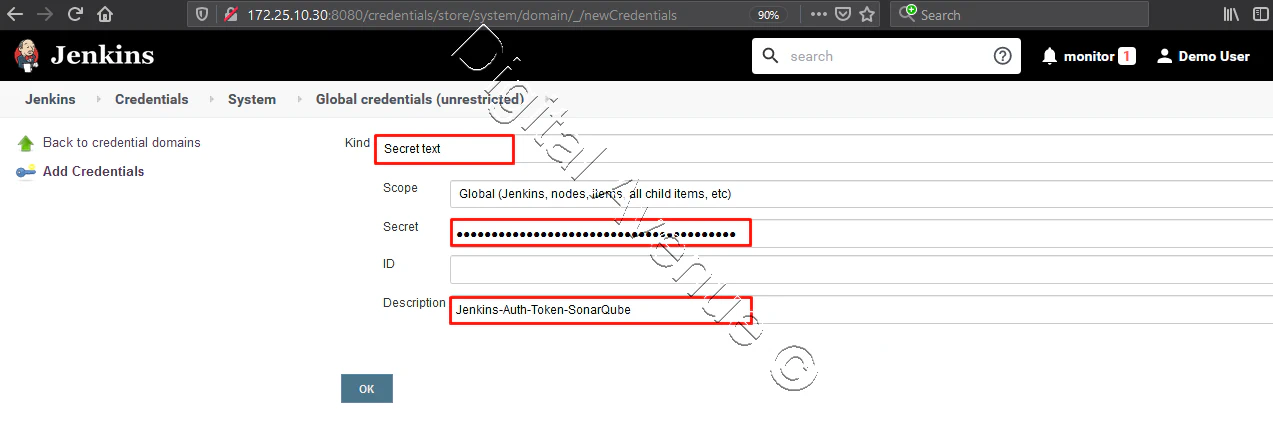
STEP 04: Add SonarQube Server on Jenkins
Now, We need to add SonarQube server settings into Jenkins.
Manage Jenkins > Configure System > SonarQube servers [Scrol Down]
Add the following settings in the “SonarQube server” section.
Enable: Enable injection of SonarQube server configuration as build environment variables
Name: Provide a descriptive name for the connection.
Server URL: Provide your SonarQube server URL with the port number.
Server Authentication Token: Select credentials that we added previously as step 02.
Apply & Save.

STEP 05: Add Sonar-Scanner For Jenkins
Goto Jenkins > Manage Jenkins > Global Tool Configuration > SonarQube Scanner [Scrol Down] > Add SonarQube-Scanner
Now, We have two options. Either we can install automatically or manually. If you install a specific version manually, you need to define the “SONAR_RUNNER_HOME” path manually.
In this case, I’m going to install it automatically.
Name: Sonar Scanner 4
Install Automatically: Enabled
Version: Select a version
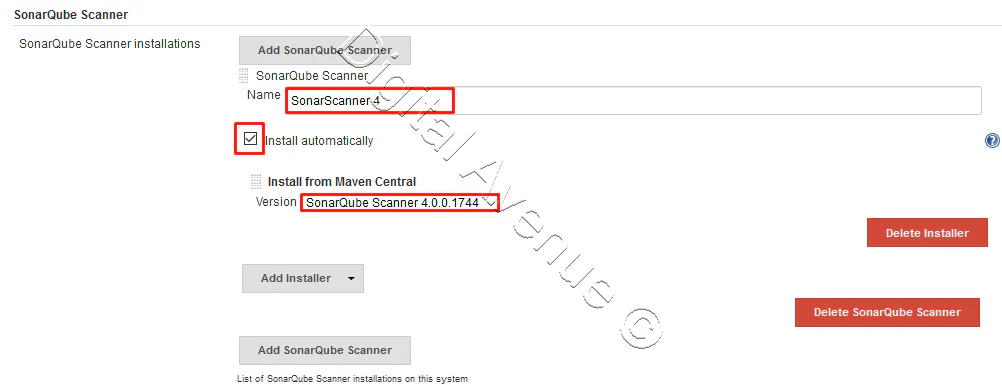
Finally, Save & Apply changes.
STEP 05: Create a Jenkins Job
Create a new freestyle project and do the following configurations.
Go-to Jenkins > New Item > Enter Project Name > Select Freestyle Project > OK

Fill-out details on the general section
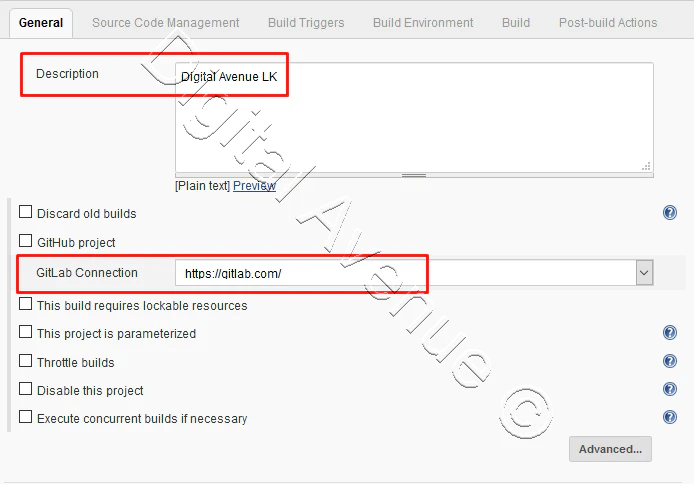
Here I have used GitLab for my source code management task. Here you can provide your own Github/GitLab repository URL and SSH Key for GitLab, as shown in my “GitLab integration with Jenkins” tutorial.
Refer to this article to know how to use SSH key authentic with Gitlab.
REF: https://digitalave.github.io/spring/2020/05/09/GitLab-Integration-with-Jenkins.html
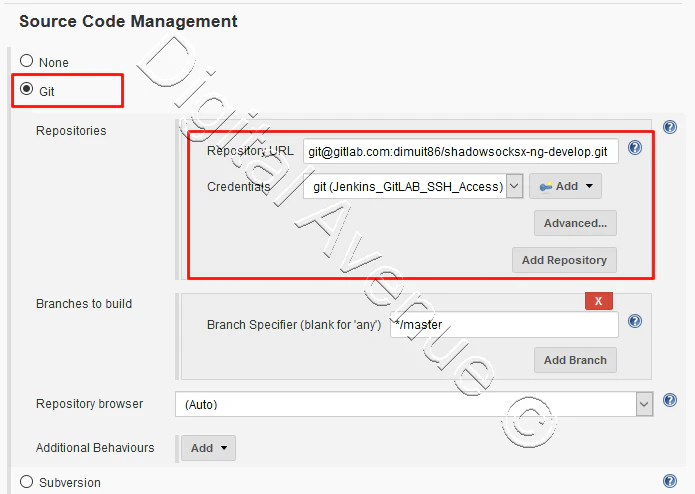
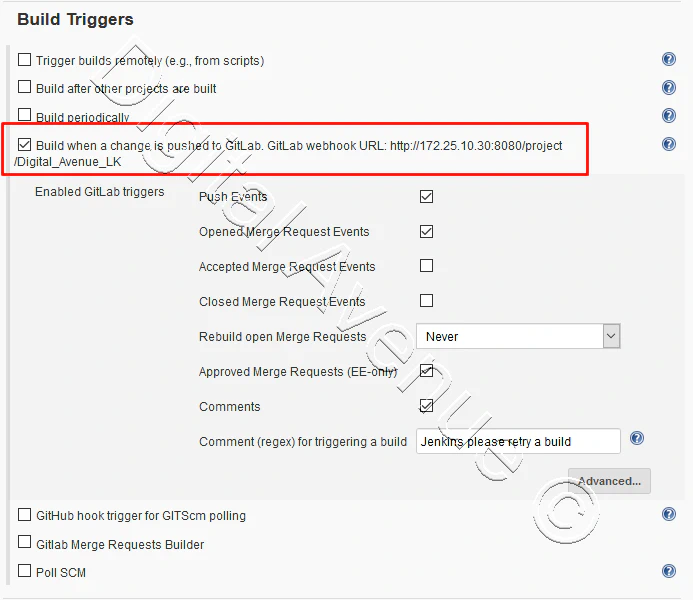
Alternatively, You also can directly enter your GitLab username and password in Jenkins > Credentials > System > Global Credentials > Add Credentials > Select “Username Password” from the drop-down menu as the option for “Kind.”
Now, Let’s move on to the “Build” section, and click “Add build step” and select the “Execute Sonar Scanner” option.
Build > Add Build Step > Execute Sonar Scanner
The task to run: Define a name for Scanner
JDK: Leave it to default or set your own JAVA
Path to project properties: In here, you can define the sonar-project. properties file location. [Optional]
Analysis properties: Define Analysis Properties
sonar.projectBaseDir=/var/lib/jenkins/workspace/{YOUR_PRJECT_DIRECTORY}
sonar.language={YOUR LANGUAGE}
sonar.login={SONARQUBE_API_TOKEN}
sonar.projectVersion=1.0
sonar.sources=.
sonar.verbose=true
sonar.projectKey={PROJECT_NAME}
sonar.host.url={SONARQUBE_URL:PORT/DNS_NAME}
sonar.projectName={PROJECT_NAME}
sonar.sourceEncoding=UTF-8
sonar.project.settings=/var/lib/jenkins/workspace/{PROJECT_NAME}/sonar-project.properties
sonar.analysis.mode=publish
sonar.buildbreaker.skip=true
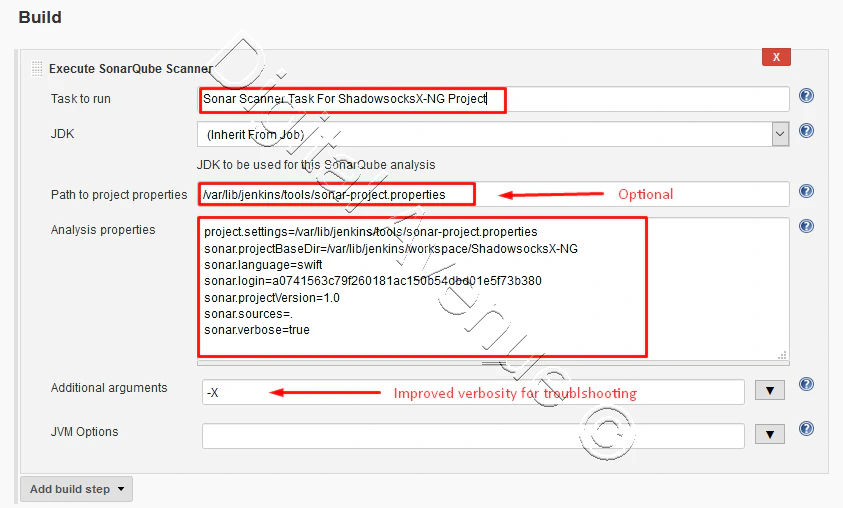
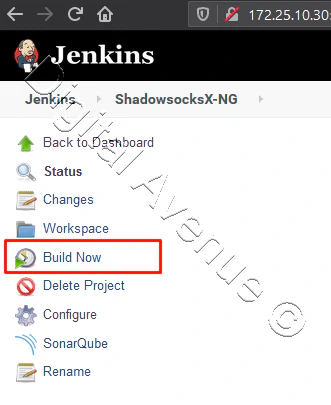
Save & Apply the changes you made. Now, the Rest of the configuration has been completed. Now, Head Over to your project home on Jenkins and run the “Build Now” button.
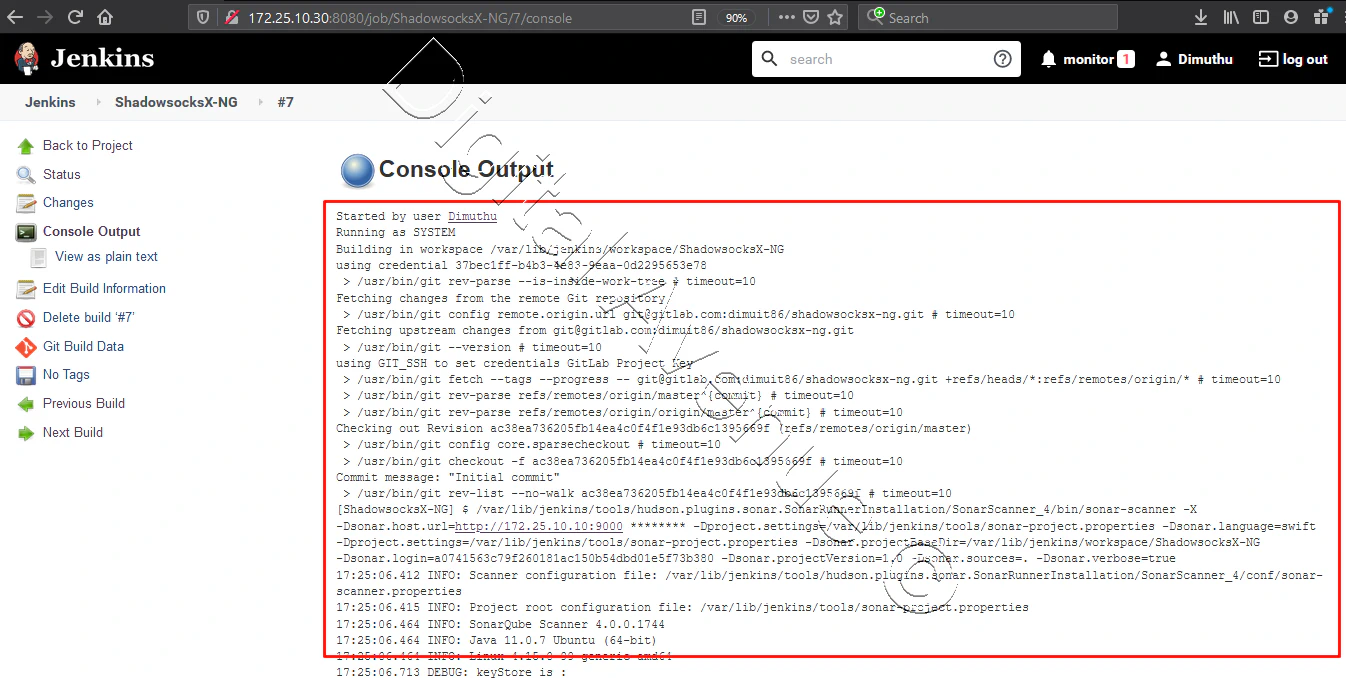
Now, Go to console output will show you a long list, and you’ll see “EXECUTION SUCCESS” status.
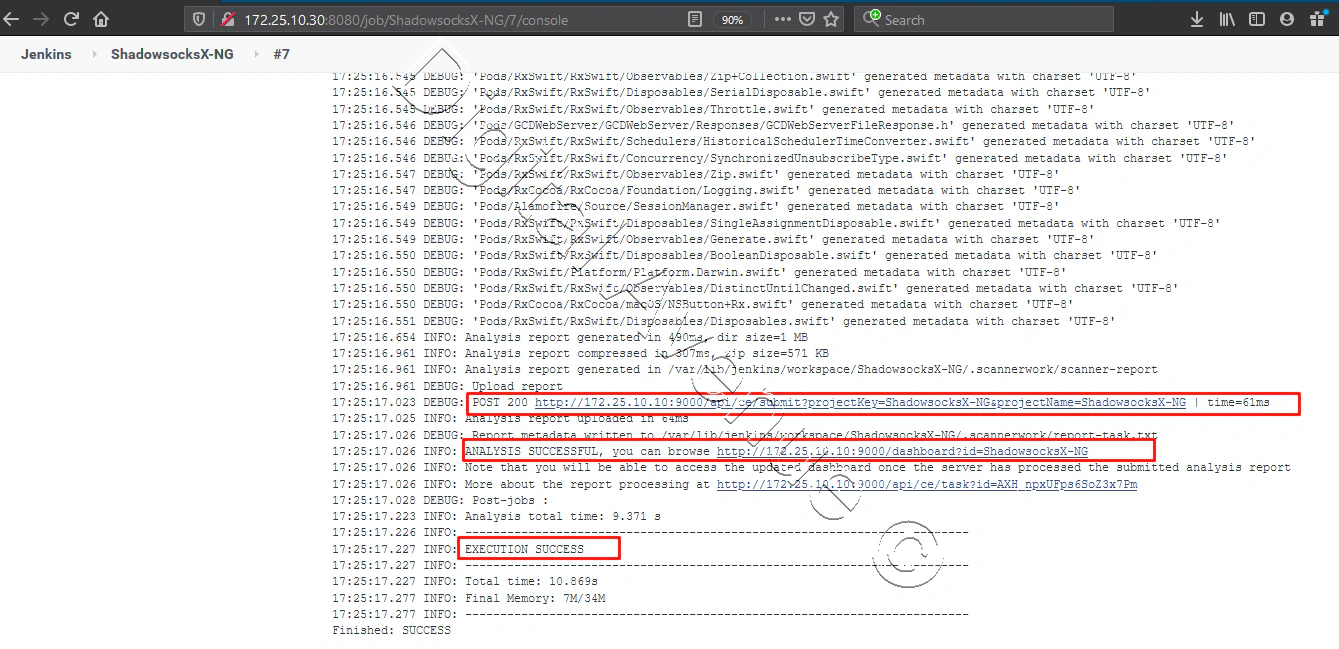
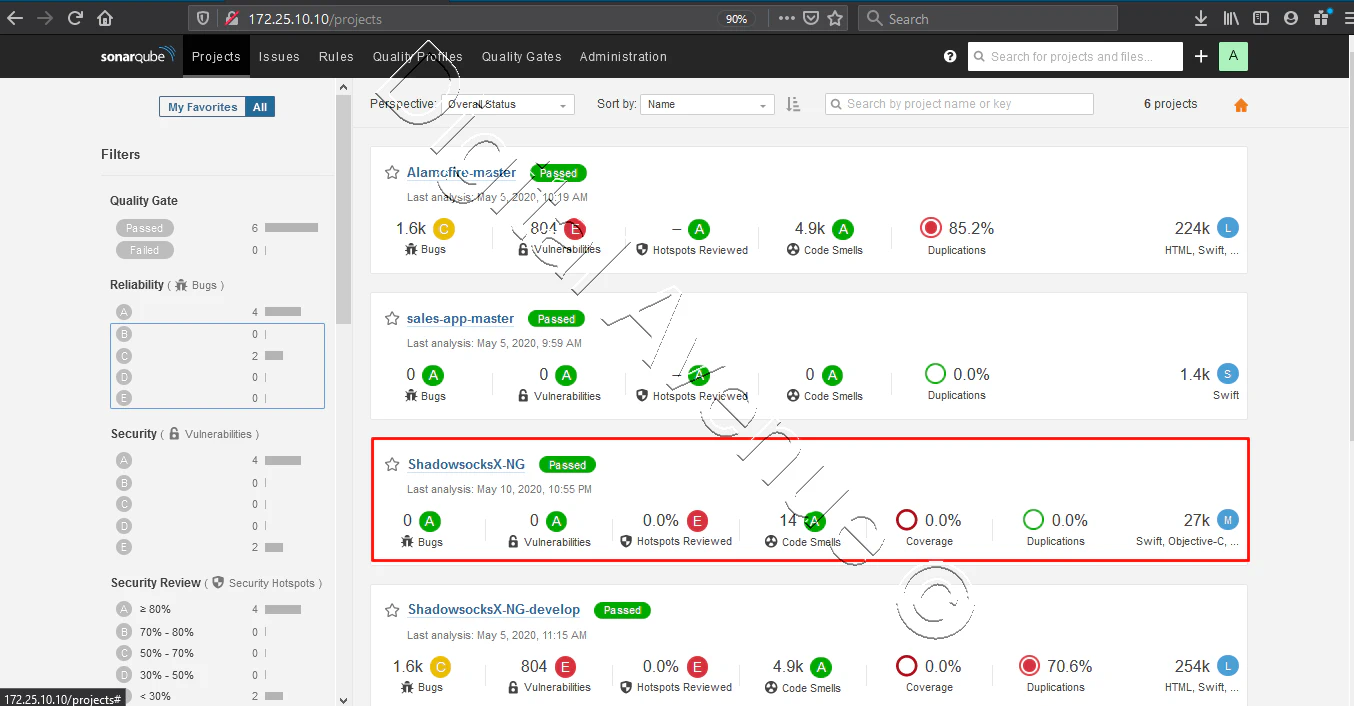
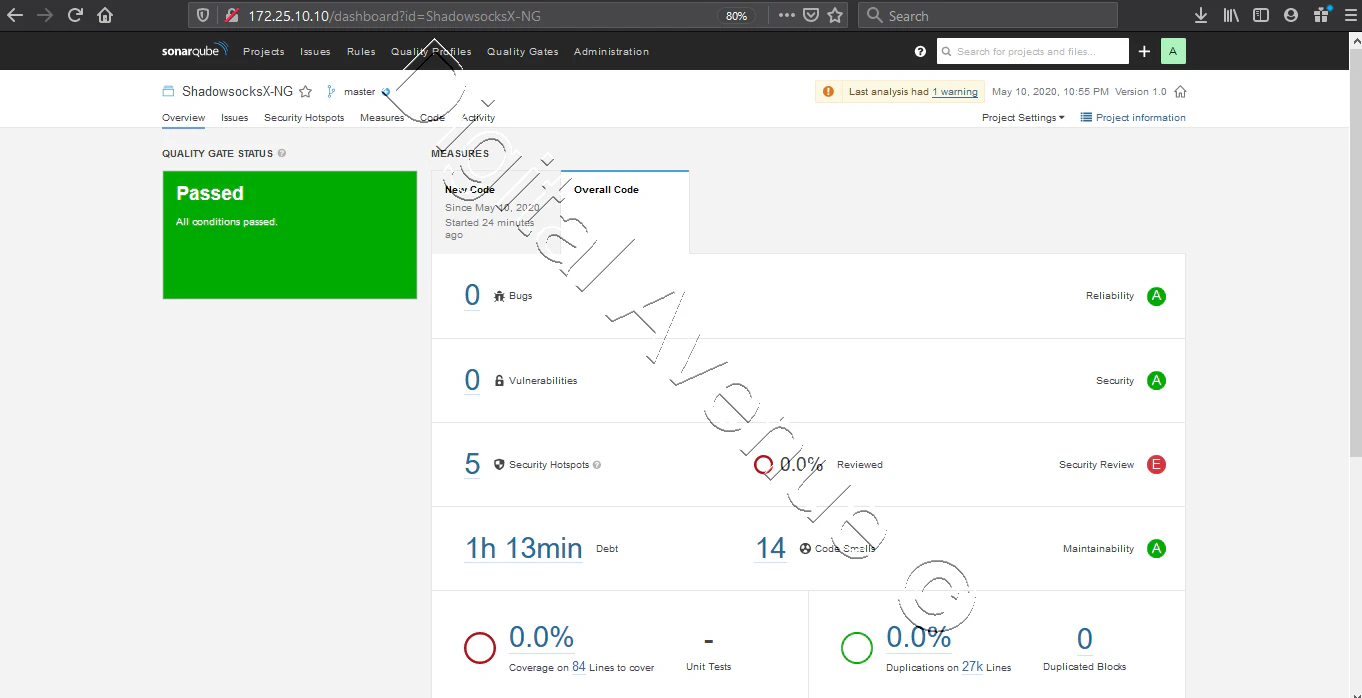
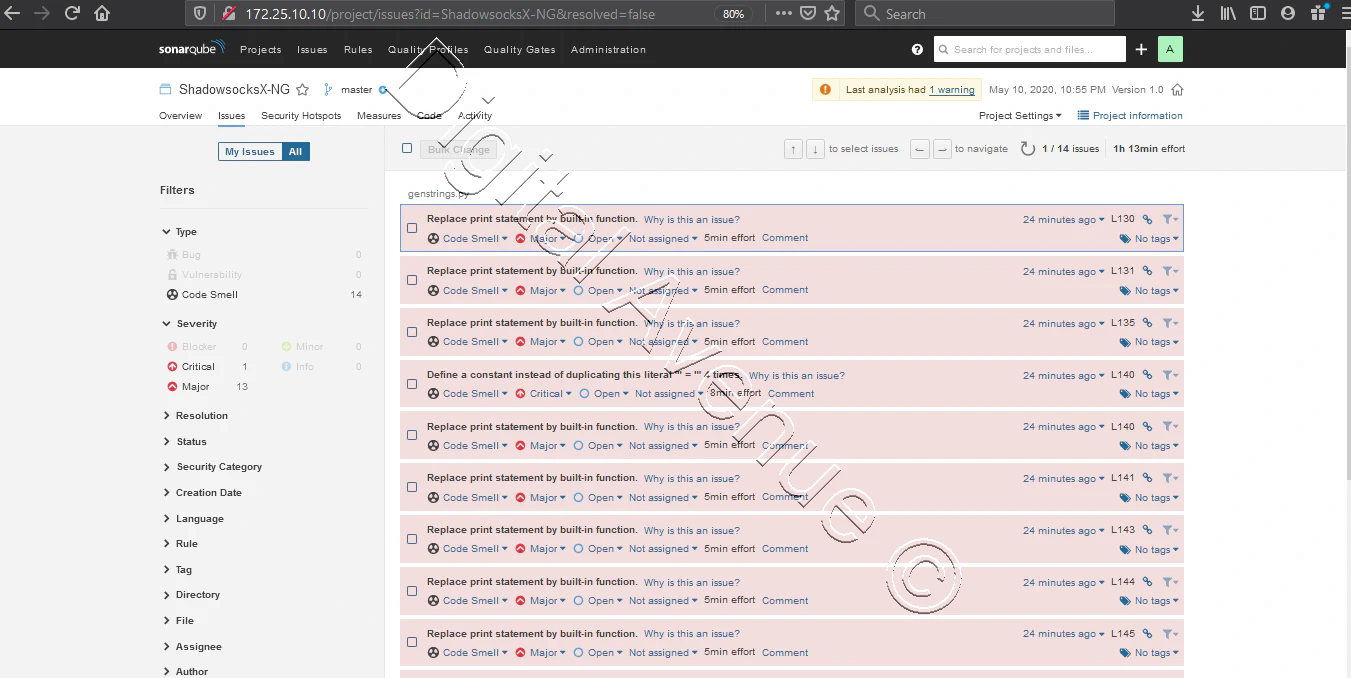
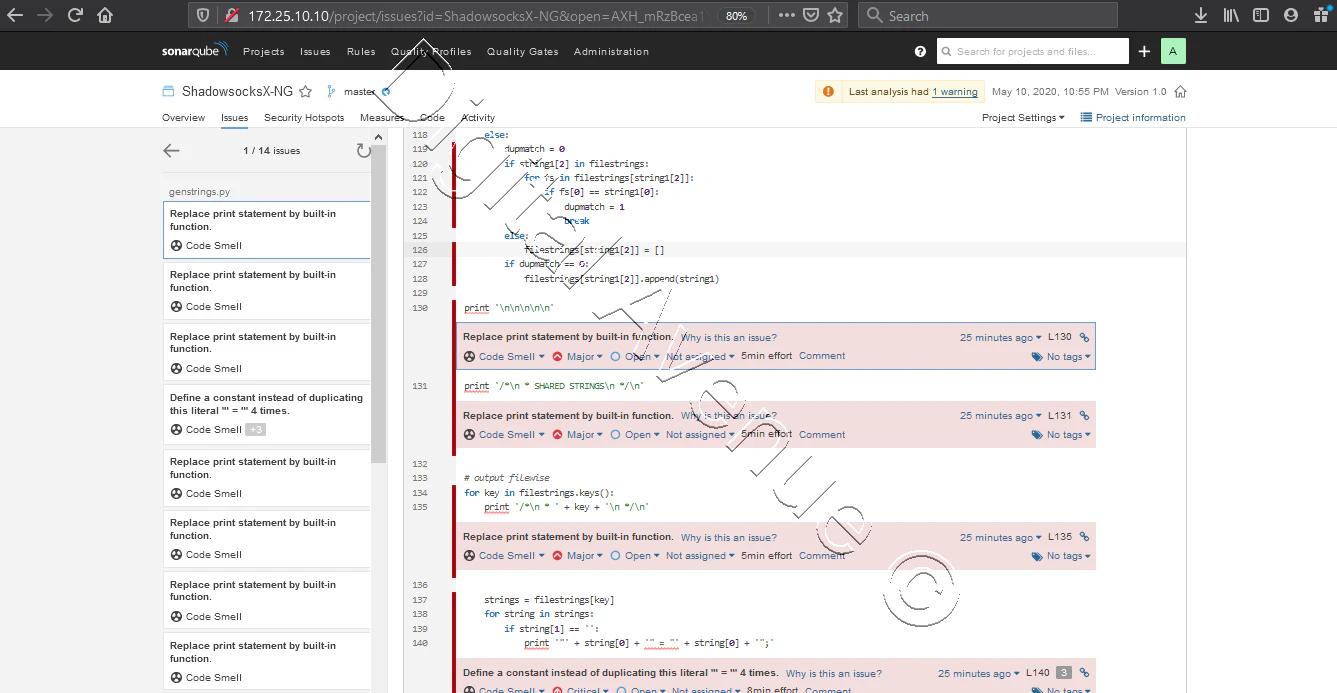
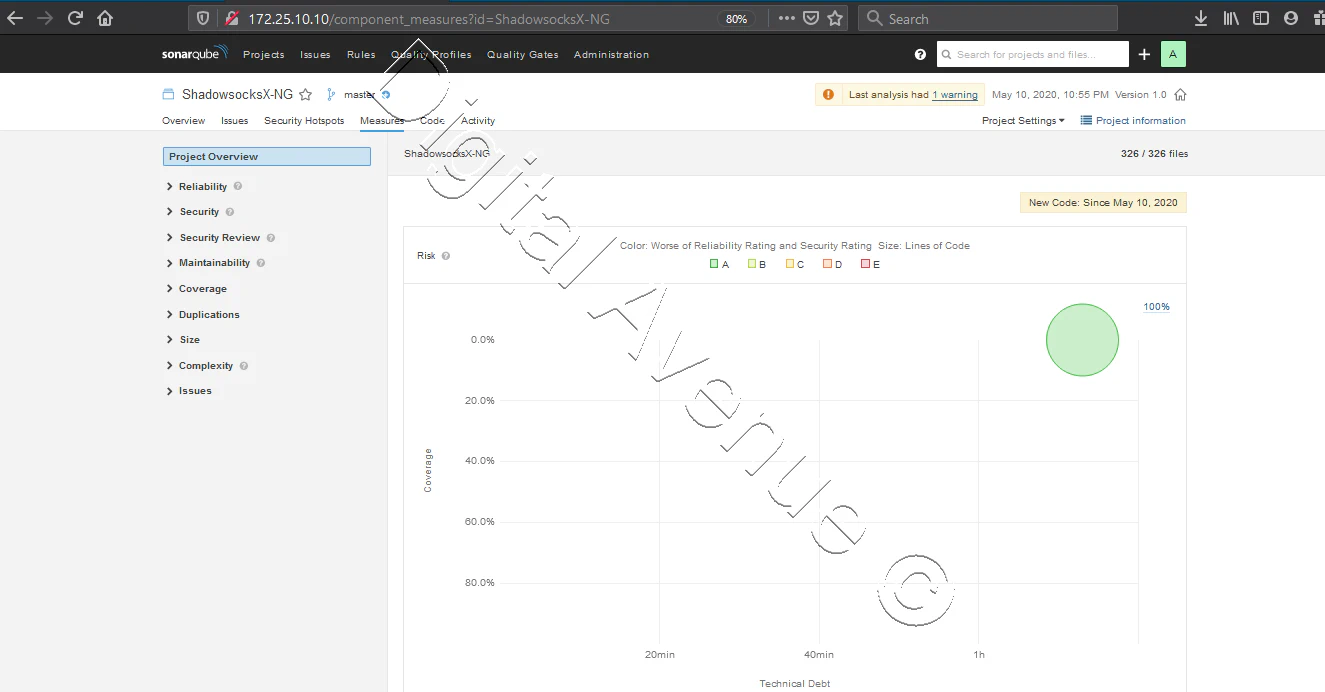
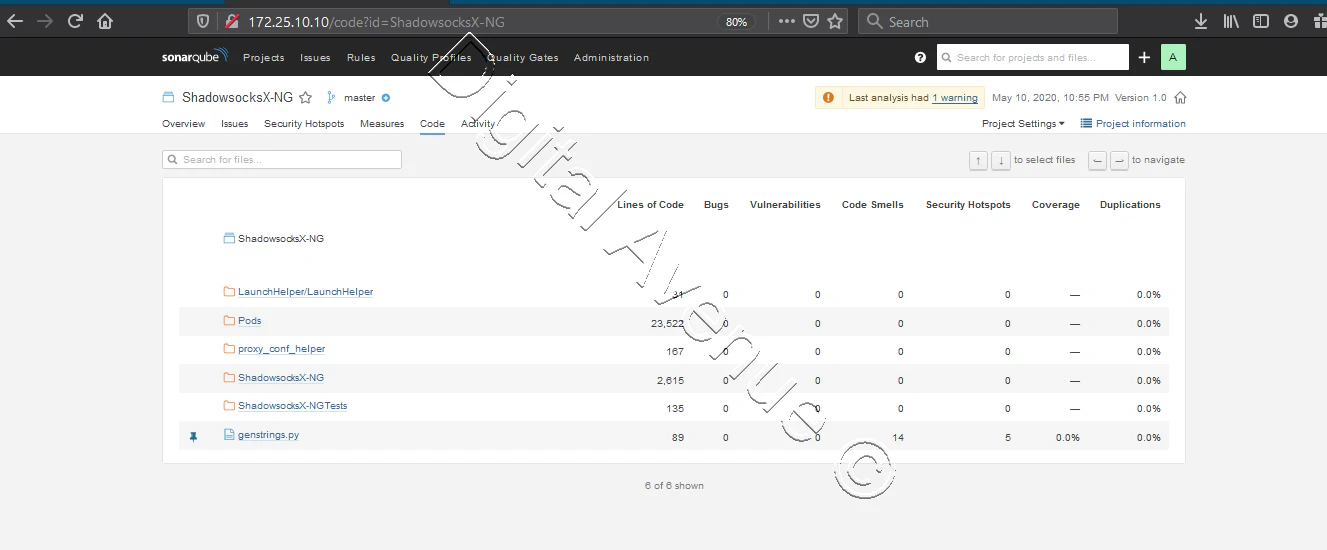
Great, Now head over to your SonarQube server. And you’ll see the analysis report for your newly built project.
Troubleshooting Tips:
Issue: Unable To Load Component Class — Project.lock Report Task GitLab Errors Resolution: Remove GitLab Plugin from SonarQube Server
https://github.com/adnovum/sonar-build-breaker https://github.com/gabrie-allaigre/sonar-gitlab-plugin
Deploy Production Grade Kubernetes Cluster on Azure AKS
Introduction This tutorial is intended to demonstrate how to setup your 1st Kubernetes cluster on Azure Kubernetes Services (AKS). This tutorial will cover up all the steps that you need to setup complete AKS cluster.
Getting Started With Docker - Quick Start Guide
Getting Started With Docker - Quick Start Guide Docker Engine Platform as a Service (PaaS) Cloud platform service. Allows you to manage its application and data.
How To Run Microsoft SQL Server On Kubernetes - Azure Kubernetes Service
Prerequisites: Azure CLI https://docs.microsoft.com/en-us/cli/azure/install-azure-cli 1. Run the Azure CLI with the az command. 1.1 Run the login command. az login Login in the browser with the azure account.
